The editor
Flowmark and the diagram side by side. Select, add, connect, rename and rearrange steps by hand while the app keeps the layout tidy.
On the canvas you change the structure of the process: which steps there are, what type they are, how they connect and which lane they sit in. The app works out where every shape goes and how the arrows run, and the layout is recalculated after every change, so a diagram you've edited by hand looks as tidy as one the assistant drafted. Where you want a step somewhere else, you can drag it to another spot in its own lane, and it stays there.
Every edit you make here is a small, named change, the same kind the assistant makes. That's why each one shows up by name in the version history and can be undone. Most edits can be made three ways: by dragging, from a menu, or from the keyboard. While you drag, a caption says what letting go will do.
Move around the diagram
- Pan: drag an empty part of the canvas, or scroll. To pan from anywhere, even over a step, hold Space and drag, or drag with the middle mouse button.
- Zoom: pinch on a trackpad, or hold ⌘ (Ctrl on Windows and Linux) and scroll. + and - zoom too.
- The canvas's top-right corner has Zoom out, Zoom in and Fit to view. Between the zoom buttons it shows the zoom level; select it to go to 100%.
The diagram fits itself to the pane when you open it, and keeps fitting as the pane changes size until you pan or zoom. After that it stays where you put it, unless a change makes the diagram outgrow the view.
Select things
Click a step, an arrow, a lane's name, a pool or a message to select it. Shift-click adds an element to the selection or takes it out (on a Mac, ⌘-click works too). To select an area, Shift-drag across empty canvas. ⌘ A selects every step. Clicking an empty part of the canvas, or pressing Esc, clears the selection.
With a step selected, the arrow keys walk the flow: → goes to the next step, ← to the one before, and ↑ ↓ move between the branches that leave the same step.
When one element is selected, a bar of tools floats above it. For a step, the bar starts with what the step is (its type) and its lane, then Ask assistant, Rename, Properties and Delete. When several are selected, the bar says how many and offers Ask assistant, Duplicate and Delete. Asking puts the selection above the assistant's message box, and the assistant knows that "this" or "these" means those elements. The status bar names the selected element, or says how many are selected.
Right-click anything on the canvas, long-press it on a touch screen, or press ⇧ F10 for a menu of everything you can do with it. Right-clicking empty canvas offers Add a step here…, Paste, Select all, Select an area, Tidy up and Set spacing.
To find a step in a large diagram, open the Outline panel from the rail. It lists every step, grouped by lane, and you can filter the list by name, type or id. Selecting a step there selects it on the canvas and brings it into view. ⇧ ⌘ O (Shift Ctrl O on Windows and Linux) opens a search for steps by name, type or id, and does the same.
Add a step
Point at a step, or select it, and a + handle appears on its right edge.
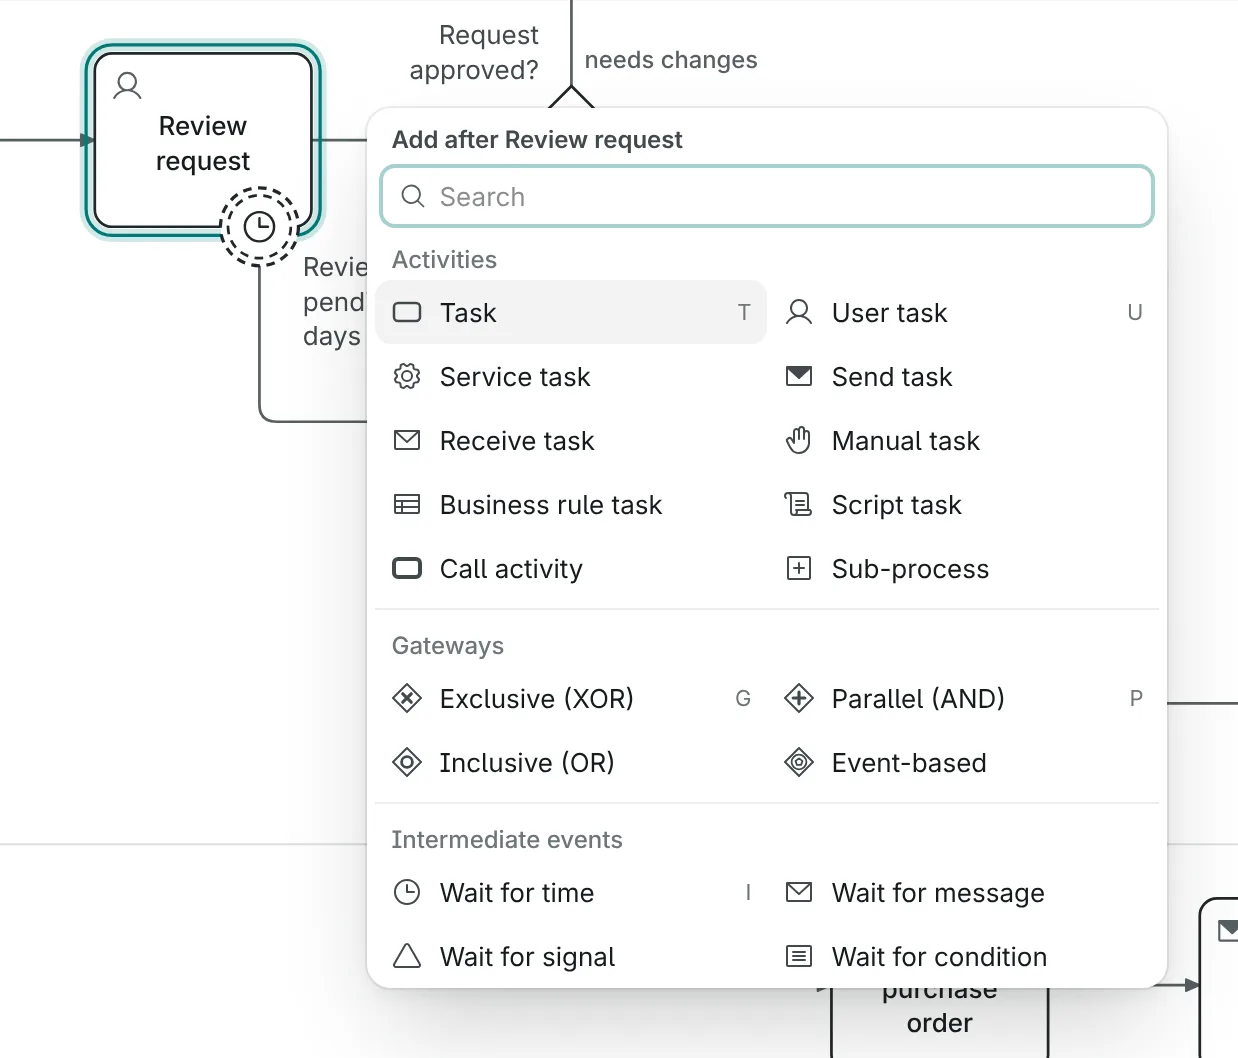
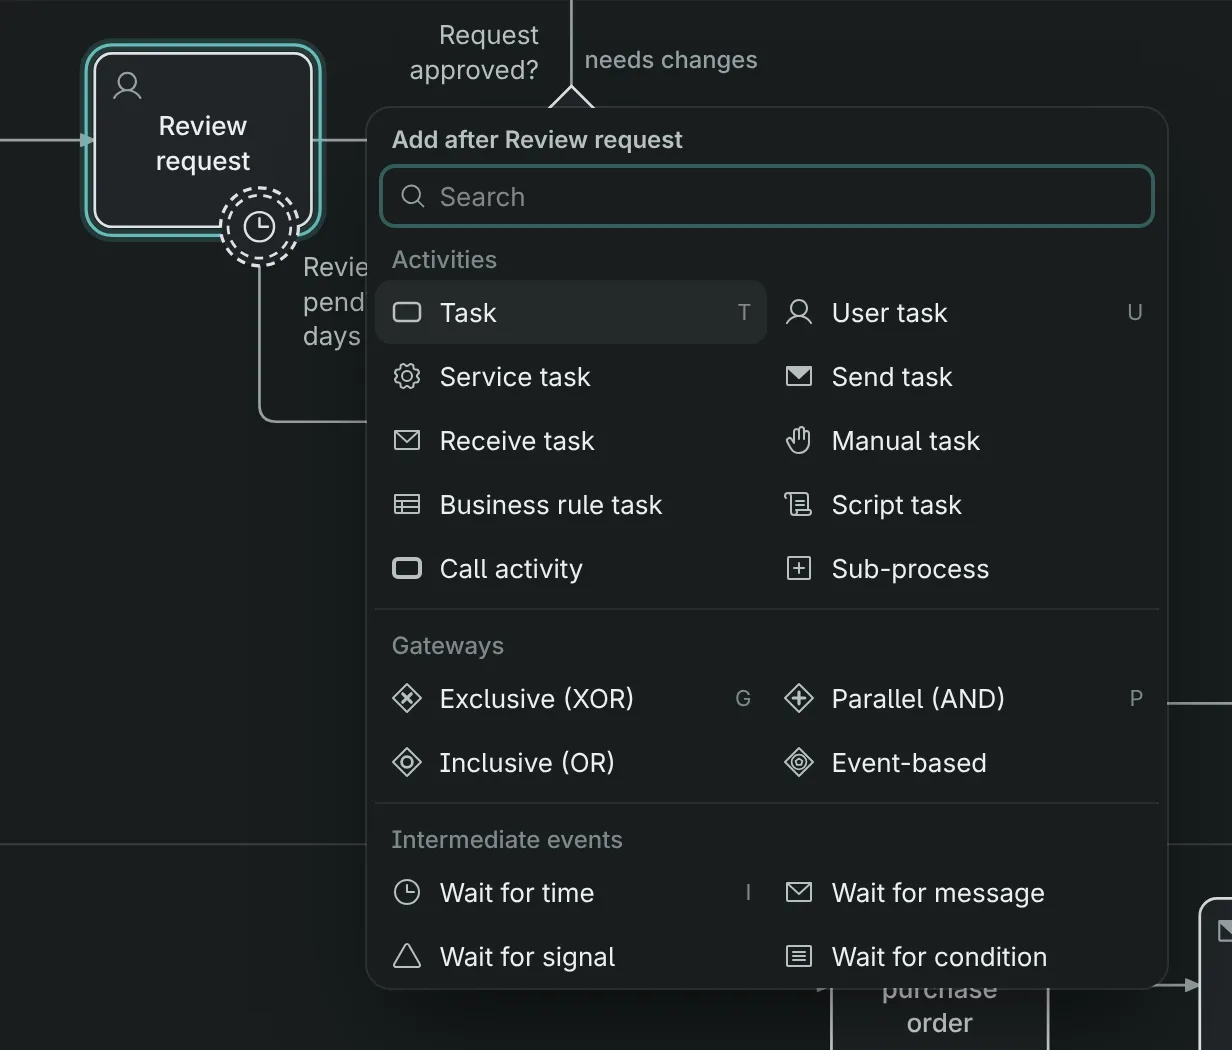
- Click the handle for the add menu: every task, gateway and event that can come next, with a search field. Pick one and it's added after the step.
- Drag the handle onto empty space and let go: the add menu opens there, and the new step starts a branch from the step, in the lane where you let go.
The new step goes in the same lane and opens for naming straight away; type its name and press Enter. A parallel split has no name, so it skips this.
Where the new step lands:
- If the step you add after leads to exactly one next step, the new one is inserted between them.
- Otherwise, for example after a gateway, the new step starts a new branch.
- An end event finishes its path, so it can't be continued.
From the keyboard, select a step and press a letter: T task, U user task, G decision (XOR), P parallel split (AND), I wait for a time, E end event. A opens the add menu.
From the palette
The palette along the bottom of the canvas has a button for each family: start event, task, gateway, intermediate event and end event, and Lane. The caret beside a button lists the other types in that family.
- Drag a button onto a step to add after it, onto an arrow to insert into it, or into a lane to add a step there that isn't connected yet.
- Click a button with a step selected to add after that step. With nothing selected, the next click on the canvas places it, the same way a drop does. Esc cancels.
Double-clicking empty canvas opens the add menu there too.
Insert a step into an arrow
Select an arrow and choose Insert a step, or drop a palette button on the arrow. The new step appears in the middle of that flow, ready to name.
Attach a timer, error or message to a task
Open the add menu from a task's + handle. Under Attach to this task you can add a Deadline, a Failure or a Message arrives. These sit on the task's border as boundary events. Add after the boundary event to say what happens when it fires.
Connect two steps
Drag a step's + handle onto the step the arrow should go to. If the connection isn't allowed, for example into a start event or out of an end event, the caption says why and nothing changes.
From a menu or the keyboard, select the step, then choose Connect to… in its right-click menu or press C, and pick the target by name.
To move an existing arrow, select it and drag either end onto another step.
To send a message to an outside pool, drag the step's + handle onto the pool and type the message's name. A decision, or an event that only receives, can't send one, and the caption says so. Steps can't be dropped into an outside pool: its steps aren't drawn.
Move a step
Drag a step onto an arrow to move it there: its old neighbours join up and it lands between the arrow's two ends. Drag it into another lane to move it to that lane. Steps that split or join the flow, and end events, can only change lane this way.
Drop a step anywhere else in its own lane and it stays where you put it. While you drag, the step and its arrows are drawn where they'll end up, so you see the arrows re-route before you let go. The arrows re-route around it, and it snaps into line with the steps it connects to, so the arrow between them runs straight. It can't sit on top of another step, and up and down it stays inside its lane: in a lane with one row of steps, that's only a little way. Flowmark doesn't show where steps were moved, and the assistant only knows how many were. Edits leave a moved step where it is, and new steps go to their usual spot.
To put a step back where the app would place it, drag it back until the caption says Back to its place, or choose Back to its place in its right-click menu. Tidy up, in the menu on empty canvas, does that for every step. A step that moves into an arrow or another lane goes back to its usual spot too.
Spacing
Set spacing, in the menu on empty canvas, sets how far apart the app places steps: Compact, Standard (the default), Roomy or Spacious. Each change is one undo step. The spacing is saved with the diagram and used in image and BPMN exports, but isn't written in Flowmark. You can also ask the assistant, for example "make it a bit more spacious" or "more room between the lanes"; it can set the gap between columns and the gap between rows and lanes separately.
Copy, paste and duplicate
- ⌘ C copies the selected steps, with the arrows between them, as Flowmark text. ⌘ X cuts them.
- ⌘ V pastes after the selected step, inserted into its flow, or as unconnected steps when nothing is selected. Flowmark copied from anywhere else pastes the same way. Pasted steps get new ids.
- ⌘ D duplicates: a single step's copy goes right after it, and several steps are copied unconnected.
Rename a step, arrow, lane, pool or message
Double-click it, or select it and press Enter or F2. You can also use Rename in its tools or menu, or Add label or Edit label on an arrow. Press Enter to save or Esc to cancel. A step's note is edited in the Properties panel instead.
Arrow labels matter most on arrows leaving a decision: they're the answers to the gateway's question, such as "yes" and "no".
Change a step's type
Select the step and click its type at the start of its tools, or press R. The menu lists what the step can become while keeping its place in the flow.
- A task can become any task type: Task, User task, Service task, Manual task, Script task, Business rule task, Send task, Receive task, Call activity or Sub-process.
- A gateway can become Exclusive (XOR), Parallel (AND), Inclusive (OR) or Event-based.
- An event can change its kind, for example a plain start event to a message or timer start.
- On a boundary event, When it happens sets whether the task stops or keeps running when the event fires.
See and change every property
The Properties panel, floating over the right side of the diagram, shows every field the diagram stores for what you've selected and lets you change it: the name, type and lane, documentation, the conditions and default flow out of a gateway, a timer's value, and whether a boundary event interrupts its task. With nothing selected it shows the process's name and documentation; with several things selected, a lane menu moves them all.
Open it with Properties in an element's tools or right-click menu, Show properties in the diagram's top-right corner, beside the zoom controls, or in the search menu, or ⌥ ⌘ P. Once open, it follows the selection, and it stays open until you hide it with its × or the same shortcut. Selecting something never opens it by itself. Opening it doesn't resize anything, and Esc closes it.
A step, event or gateway also has a Note: a short remark drawn on the diagram beside it, such as "SLA 24 hours". Add note in a step's right-click menu, or in the search menu when one element is selected, takes you to that field. Clicking a note on the canvas selects its element.
Outside pools and their messages are in the panel too. With a pool selected you can rename it, draw it above or below the process, and add messages to and from its steps. A step that can send or receive lists its messages, and Add there sends to or receives from a pool, or creates a new one. Pools and messages can also be selected, renamed and deleted on the canvas like steps. See Pools and messages for how they work.
Each change is one undo step with its own name in the version history. A timer is typed as ISO 8601, such as P2D, with its meaning in words below it and quick picks for 1 hour, 1 day, 2 days and 1 week. At the bottom, each element shows its id, with Copy.
Comment on the diagram
Comments are notes for you and the assistant, pinned to the elements they're about: a question to settle, a change to make later. Only you and the assistant see them. They aren't part of the diagram's versions or exports, and view-only links don't show them.
- Write one: select one or more elements and press M, or choose Comment in the element's tools or right-click menu. Type it and press ⌘ ↵ (Ctrl Enter) to post. If you close the box first, what you typed stays as a draft.
- Read and reply: each open thread has a pin on its element, with the number of comments in it: at the top-right corner of a step (past its note, if it has one) or a pool, near the top of a lane, and in the middle of an arrow or a message. Click the pin to read the thread and reply.
- Resolve: Resolve in the thread's header closes it and removes its pin; Undo in the confirmation brings it back. Ask assistant puts the thread to the assistant, quoted, with its elements selected.
- See them all: once the diagram has comments, the status bar along the bottom of the card shows how many threads are open. Select the count to list them, with resolved ones behind a toggle. A thread whose elements were deleted stays in the list and says what it was on.
Comments follow their elements through renames, moves and changes of type. You can comment while Flowmark has a mistake, because a comment doesn't change the diagram.
Make an arrow the default flow
Select an arrow leaving a decision gateway, an inclusive gateway or a task, and choose Make default flow. The default flow is the one taken when no other condition holds. Choose it again to turn it off.
Work with lanes
Lanes show who does each step. Each lane's name sits inside the lane at its top-left. Click the name, or the empty strip along the lane's left edge, to select the lane.
- Add a lane: point to the bottom edge of the pool and select Add lane where it appears, use Lane in the palette, or press L on the canvas. The new lane goes at the bottom, ready for its name. You can also select a lane and choose Add lane below, or right-click it for Add lane above.
- Rename, reorder: select the lane and use Rename lane, Move up or Move down.
- Move a step to another lane: drag it into the lane, or select it and pick the lane from the lane menu in its tools, which shows the step's current lane. The menu appears once the diagram has two or more lanes. With several steps selected, Move to lane in the right-click menu moves them all.
- Delete a lane: select it and choose Delete lane. Its steps move to the nearest lane that stays, the one above if there is one. The last remaining lane can't be deleted, and if you select every lane and delete them, the top one stays.
Delete things
Select one or more elements and press ⌫ (Backspace) or Delete, or use Delete in the element's tools or menu. A selection can mix steps, arrows, lanes, pools and messages.
When you delete a step that sits in a straight line, the steps before and after it are joined up so the flow doesn't break. Boundary events attached to a task are deleted with it. Deleting a step also deletes its arrows and messages, and deleting a pool deletes its messages. The steps of a deleted lane move to the nearest lane that stays, and a note at the bottom of the canvas says where they went.
Undo and redo
Use Undo and Redo in the canvas's top-left corner, or press ⌘ Z and ⇧ ⌘ Z (Ctrl Z and Shift Ctrl Z on Windows and Linux) anywhere except while you're typing in a text field. In the Flowmark pane, those keys undo your typing instead.
Undo covers every change to the diagram, not only canvas edits: Flowmark edits, the assistant's changes, and versions that arrived from another tab or from your AI app. Everything the assistant changes for one request undoes as one step. Each diagram keeps its own undo steps, up to 100, for as long as the page is open. Reloading clears them, but the version history keeps going.
While the assistant waits for you to apply a proposed change, undo and redo are off, and the canvas and Flowmark can't be edited. See Approve changes first.
Show Flowmark, the diagram or both
The Flowmark pane sits to the left of the diagram, and takes about a third of the width at first. Drag the line between them to change that. The View switch at the top of the diagram picks Flowmark only, Side by side, or Diagram only. ⌘ \ (Ctrl \ on Windows and Linux) hides Flowmark, and shows it again beside the diagram. In a window too narrow for both, you get one at a time.
How the canvas and Flowmark stay in sync
The diagram and Flowmark are two ways of looking at one process model.
- A canvas edit changes the model, and the Flowmark text is regenerated from it.
- In the Flowmark pane, changes apply to the diagram as you type, after a short pause. When your typing reaches the diagram, the pane's header says In sync for a moment. If a line has a mistake, the header shows the message with its line number instead, and so does the Problems panel; select it to jump to that line. The diagram keeps its last good state until you fix it. Reformat, in the pane's header whenever the text isn't in the app's standard layout, tidies it. See Flowmark for the syntax.
- The Flowmark text follows changes made on the canvas or by the assistant, except while you're in the middle of typing.
- The BPMN XML is generated from the same model. To see it, use View BPMN XML… in the Export menu. See Share and export.
The canvas always shows the automatic layout. When you import a file that has a layout of its own, its XML keeps that layout until your first change; after that, the XML follows the automatic layout too.